
Technicians guide to properly shielding your instrument.
We are lucky in that we interact with a massive amount of people modding their instruments. But at the volume we are at, we notice trends. One trend that pops up a lot is troubleshooting someone's "Faulty" kit that turned out to be an issue with them installing shielding incorrectly in either an instrument that is prone to noise, or that will be played in front of a noisy post instrument rig. Wondering why this keeps happening, we started looking at some of the online instructions and noticed that they all either miss or gloss over a key detail. So below will be our technicians guide to properly shielding your instrument.
So why would you want to shield your cavity?
Adding shielding to your instrument's cavity can be a must for some players. Your instruments electronics, whether that's your pickups, or wiring, is sensitive to RFI's (Radio Frequency Interference) and interference from things like speakers, amplifiers, and other equipment. In the Wiring world the rule of thumb even for "noiseless" pickups is that the more complex the circuit gets with pickup switching, the more important it is to have proper shielding. When we "Shield" our cavity, all you are doing is basically creating a Farraday Cage. This "cage" acts as a barrier that either distributes, or cancels any incoming "noise"
Although, it's pretty straightforward it can be easy to mess up. Doing so will cause you to get even more hum than you had previously. So
Here's how to properly shield your cavity.
What you need:

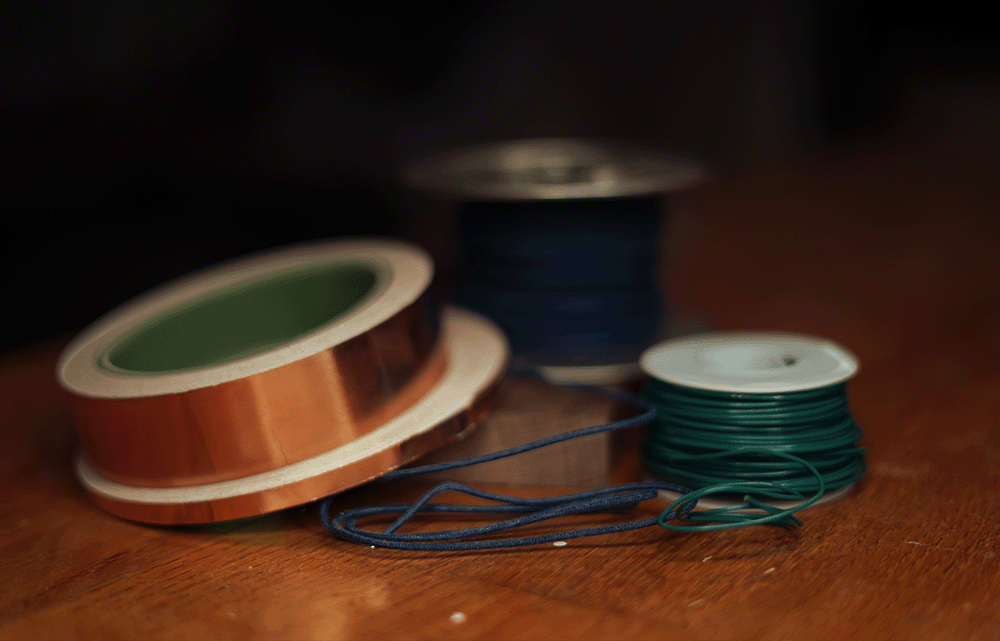
Shielding Material
- Common option - Copper Tape: Preferably "Conductive" Copper Tape. But if you can't find any you can use any copper tape and either scrape a small section of the glue when overlapping or add a dab of solder. The goal is to make it one continuous piece of copper.
- Alternative option not shown- Shielding Paint: This is the more expensive option. But it can be the easiest to use as you are just painting it on.
Wire:
- 18AWG-22AWG Wire. This will be used for connecting the Cage to our Wiring.
- 22AWG-28AWG Wire. This is used for guitars that have separated cavities. The Smaller the connecting hole the higher AWG you want.
Only If using Shielding Paint:
- Automotive Ring Connectors
- Pickguard Screws
Prep work
Before we start make sure and clean anything we are adding the shielding too. The goal is for there to be no dust, woodchips, or buffing compound anywhere we apply the shielding so we can make a good bond with the surface.
Step 1: Apply the Shielding
In this instruction we will be using Copper tape. But if you are using Shielding paint then you want to just paint on the shielding. Refer to your paints manufacture, but it is common for you to have to apply 2-3 coats while allowing 24 hours before moving on to the next step.
Applying Copper Tape to the Cavities
The goal is to overlap. I like to start from the back of the cavity and then work my way up. But whatever feels the best for you or your cavity should be how you do it.


Once it is done, you will want to add the tape to the top of the route for the next stage of shielding. You don't have to do the whole top route. But for instruments with a thin top route, I like to add it to places where you have screws. Just note that for instruments like a Strat, or P bass we want the copper to be on the top of the body 1/8th-1/4th inch
Applying Copper Tape to covers or Pickguards.
We are again overlapping to create one continuous piece. Just note like before for instruments like a Strat, or P bass. We only need shielding where there is a cavity underneath. Again allowing 1/8-1/4th inch of overlap

Now with those done, you can see that when they are laid flat on the instrument it is touching the cavities shielding, making it a cage for your cavity.
Step 2: Connecting the Cavities.
I wouldn't recommend this step if you are not the best at soldering. This is mainly overkill, or for those in areas with a large amount of RFI. But for guitars that have multiple separate cavities we want to connect each cavity together by soldering on our thin wire to the copper tape. If you used Shielding Paint, then you want to connect the cavities by using the thin wire, with the ring connectors attached and then screwing them into the cavities.


Step 3: Finishing the Cage
Next what we want to do is solder on the thicker wire to the copper tape. This wire is going to be attached to our wiring itself. if you use the shielding paint, it's the same idea as step 2. Using the Ring connector, screw it into the cavity. you can share with another ring if you prefer. But solder the other end of the wire to the wiring harness.
One quick note: Step 3 is commonly missed or glossed over in instructions. Not doing this one step will cause that "shielding" to act in reverse, trapping in those RFI's for longer than normal.


Thats It. Now you are properly Shielded.
Read more

5 ways to Improve your SG guitar
In the world of electric guitars, few names hold as much weight as the SG. From the early days of rock 'n' roll to the golden era of "classic rock", the SG became the instrument of choice for count...
Read more
Knobs the Silent killers of Potentiometers
I know what you are thinking. This is clickbait. But its not. At this time we have sold tens of thousands of kits that we worked really hard to make audibly perfect. But, we started noticing a patt...
Read more
Leave a comment
This site is protected by reCAPTCHA and the Google Privacy Policy and Terms of Service apply.